
Last updated November 22, 2026
 Sweep & inspection
 Caps & crowns
 Flue relining
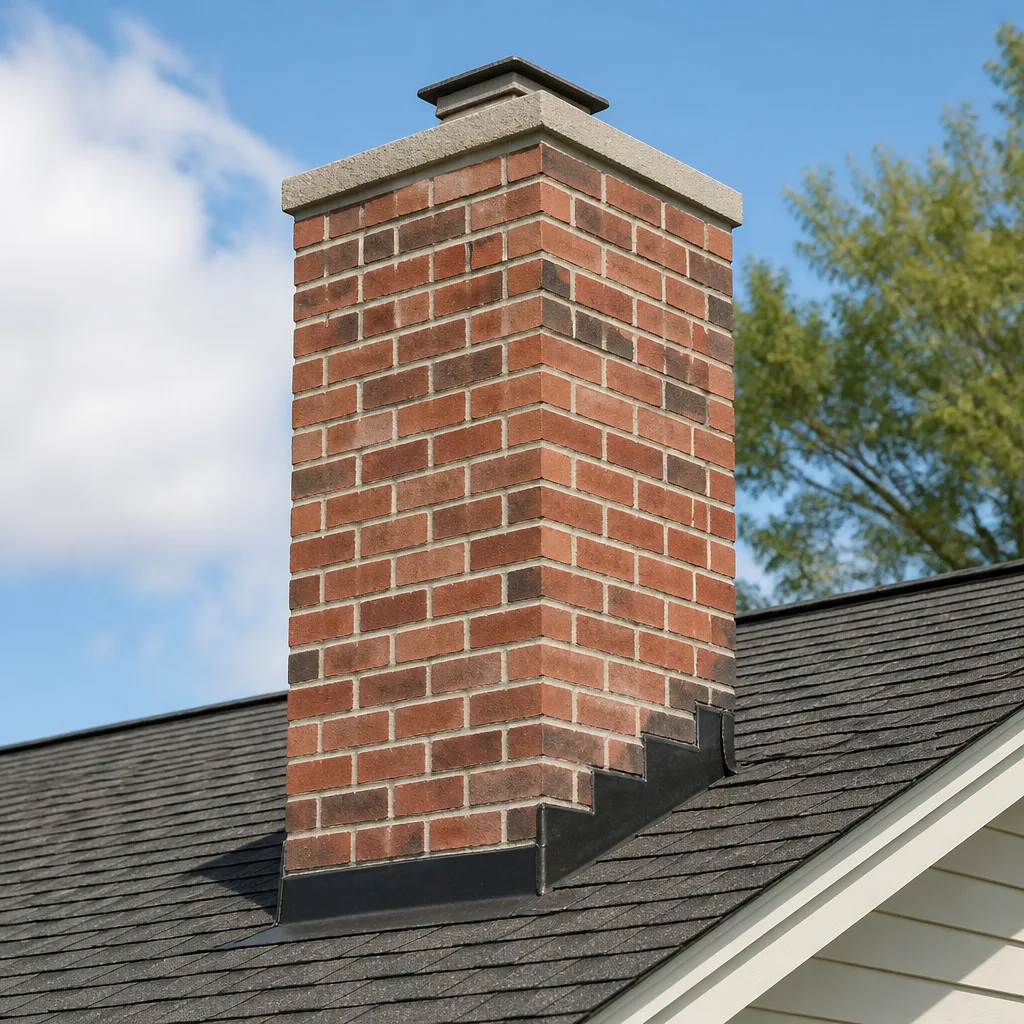 Masonry repair
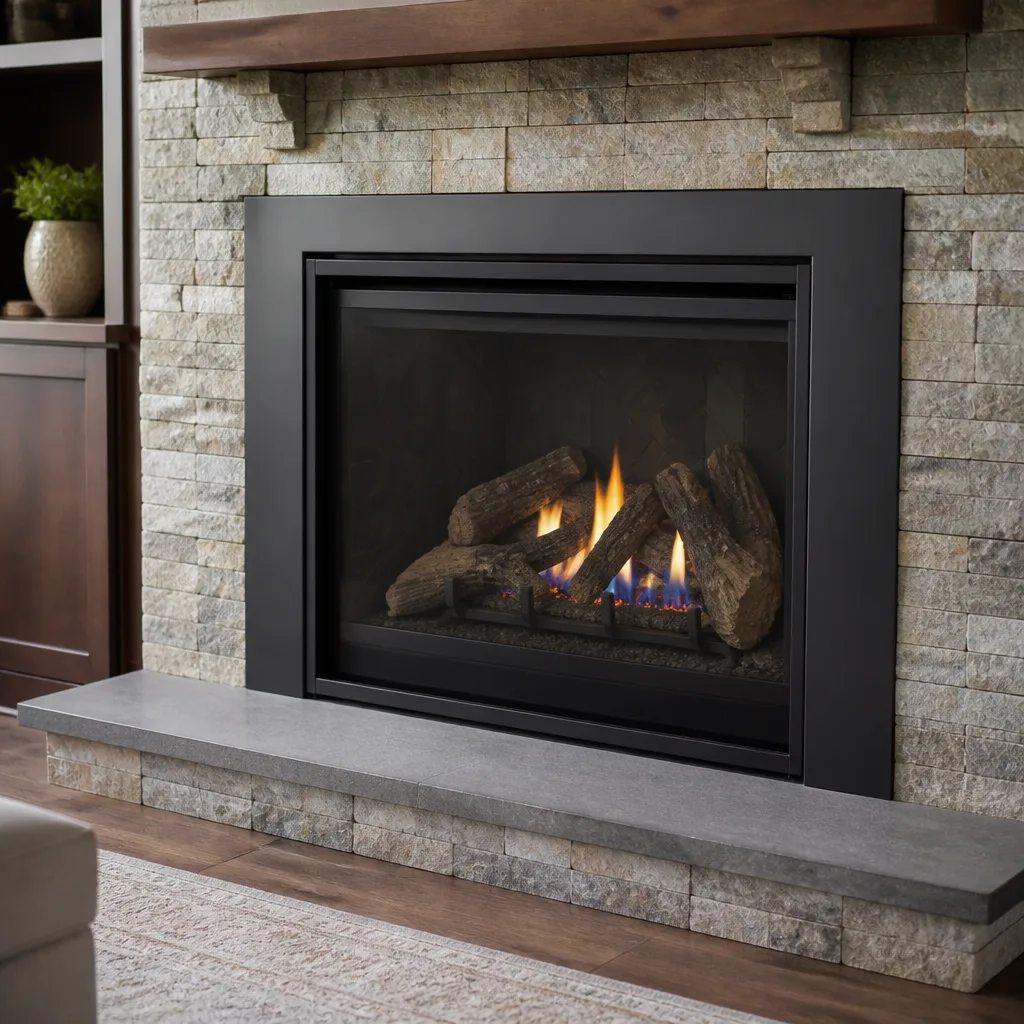 Gas fireplace service
Level 1 sweep and inspection to the NFPA 211 annual standard - flue, crown, cap, and flashing checked and photographed
Chimney sweep logs do not sweep chimneys. They loosen some creosote - which then falls where a brush and vacuum still have to collect it.
DIY vs Professional Chimney Cleaning: The Elmhurst Homeowner’s Decision Guide
You can buy a chimney brush kit for $45 and remove first-degree creosote from your flue – and that’s about where the DIY case ends. Here’s what the brush doesn’t tell you. A brush scrapes what it touches, and that’s it. It cannot see a hairline crack in a terra cotta liner, cannot spot a mortar joint that has crumbled behind a bend, and cannot distinguish the soft, brushable creosote from the glazed, tar-like layer that needs a different approach entirely. In Elmhurst’s older housing stock, that gap between what a brush reaches and what the flue actually needs is where money gets spent twice. This guide draws a clear line between the cleaning you can reasonably do yourself and the work that requires a trained eye, a camera, and professional equipment. You’ll learn what a brush physically accomplishes, what it misses, the specific risks of pre-1970 liners, and the one scenario where DIY genuinely makes sense.
Quick Answer
DIY chimney cleaning is only worth considering for a gas-only fireplace with a stainless steel liner under 10 years old that sees light use. For any wood-burning chimney, and especially for Elmhurst’s older homes with terra cotta liners, professional cleaning is the safer and more economical choice – not because a homeowner can’t push a brush, but because only an inspection with a camera can reveal the cracks, joint deterioration, and glazed creosote that a brush leaves behind.
Styles & brands we work with
- Sweep & inspection
- Caps & crowns
- Flue relining
- Masonry repair
- Gas fireplace service
Table of Contents
- What a DIY Brush Actually Accomplishes
- What the Brush Cannot See: The Diagnostic Gap
- The Elmhurst Housing Stock Risk Profile
- The Equipment Gap: What Professionals Bring
- The One Scenario Where DIY Is Reasonable
- How to Inspect Your Own Chimney Between Professional Visits
- Creosote Degrees and Why They Matter
- A Step-by-Step Decision Framework
What a DIY Brush Actually Accomplishes
A chimney brush does one job well: it removes loose, flaky creosote from the walls it can physically reach. That’s a real contribution to safety, and it’s worth understanding precisely. When creosote builds up in its first-degree form – the soot-and-flake stage – it’s friable enough that a stiff polypropylene or wire brush will knock it loose and send it down into the firebox or a collection bag, depending on how the flue is configured.
What the brush accomplishes, more specifically:
- Removes first-degree creosote – the soft, sooty deposits that accumulate on flue walls during normal wood burning. This is the layer that’s genuinely brushable.
- Clears light soot from accessible flue sections – straight runs respond reasonably well to a brush on a rod.
- Dislodges nesting material near the top – if a bird or squirrel has gotten past a missing cap, a brush can sometimes push the debris down, though this carries its own hazards.
What it does not accomplish is just as important. The brush doesn’t remove second-degree creosote (that hard, crusty layer that bonds to the flue wall), and it absolutely does not touch third-degree glazed creosote, the shiny, tar-like deposit that requires chemical treatment or, in severe cases, relining. It doesn’t reach behind offsets, around smoke chamber baffles, or into the far corners of the smoke chamber above the damper. It doesn’t clean the smoke shelf, where deposits collect but a straight brush can’t angle. And a homeowner doing the work typically can’t inspect the flue while also cleaning it – you can’t see what you’ve scrubbed from the bottom of a dirty flue.
The distinction matters because creosote isn’t a nuisance that builds evenly. It builds unevenly, in the coolest parts of the flue where condensation forms, which in most Elmhurst homes means the upper third and the smoke chamber. A brush from the firebox up removes what’s easy; the hard-to-reach deposits, the ones that actually fuel a chimney fire, often remain.
What the Brush Cannot See: The Diagnostic Gap
The real argument against DIY chimney cleaning isn’t that homeowners are clumsy. It’s that cleaning without inspection is a blind act. A sweep is a diagnostic service as much as a cleaning one, and the diagnostic half is where professional work earns its cost. Here’s what a brush, no matter how carefully used, cannot detect:
- Liner cracks and gaps – a terra cotta flue tile can crack invisibly at the joint or along its length. The flue still drafts, so nothing seems wrong, until combustion gases escape into the wall cavity or the surrounding framing.
- Mortar joint deterioration – the joints between flue tiles erode over time. A joint that has receded by a half inch looks fine from the firebox but creates a pathway for gases and heat to reach the chimney’s outer shell.
- Offset obstructions – older chimneys frequently offset (angle) partway up to clear a roofline or interior wall. Debris, broken tile fragments, or nests can lodge at the offset, and no brush from below will reveal that it’s there.
- Glazed creosote – second- and third-degree creosote doesn’t flake off when brushed. Homeowners often sweep a flue that looks “clean” afterward because the brush bounced off the glaze without removing it.
- Flue blockage from the top – a cracked flue cap, a rusted cap screen, or a collapsed crown can restrict the flue opening. From inside the firebox, the chimney still appears to function.
- Smoke chamber damage – the smoke chamber above the damper takes a beating from heat and creosote. Its angled walls are one of the first places to show spalling, and a brush never reaches it properly.
The list is not meant to alarm. Most chimneys are in reasonable shape and just need cleaning. But the whole point of professional cleaning is that the technician can tell the difference between a chimney that’s fine and one that’s developing a problem – and can show the homeowner exactly what they found. That’s why we include a camera inspection and a photo report with every chimney sweep: so the homeowner sees what we see. A brush alone can’t do that, and neither can an untrained eye peering up the flue with a flashlight.
The Elmhurst Housing Stock Risk Profile
Elmhurst is a Queens neighborhood with a lot of homes built before 1970, and that matters for this decision more than any general rule about chimney care. Pre-1970 masonry chimneys in this part of Queens were almost universally built with terra cotta flue liners – clay tiles stacked and mortared in place. Terra cotta is a durable material, but it’s brittle. It doesn’t flex with the house, and over decades of heating and cooling cycles in the Northeast climate, those tiles will crack and the mortar joints between them will erode.
Why does that make DIY different in Elmhurst than in a newer subdivision?
- Terra cotta liners fail invisibly. A cracked terra cotta tile doesn’t announce itself. The flue still drafts, the fireplace still burns, and the only way to know is a camera inspection. In a home with a stainless liner installed recently, the liner is the whole flue – a stainless liner, from a brand like DuraFlex, is engineered so that a crack in the surrounding terra cotta doesn’t compromise the venting pathway. In a house without that liner, the terra cotta is the venting pathway, and a crack in it is a real defect.
- Age means accumulated joint deterioration. A chimney that’s been through fifty winters has been through fifty freeze-thaw cycles. The mortar in the joints between tiles is the first thing to go. Homeowners looking up from the firebox see the bottom tile or two and assume the rest is similar. It often isn’t.
- Renovation history adds uncertainty. Many Elmhurst homes have had the fireplace or heating system replaced, sometimes without a permit trail the current owner can trace. A homeowner doesn’t know what’s behind the wall or above the smoke chamber until someone inspects it.
None of this means an older Elmhurst chimney is a crisis waiting to happen. Most are fine. But “most are fine” is exactly the reason a trained inspection matters: the ones that aren’t fine don’t look different from the ones that are, until someone looks properly. Our technicians have up to 9 years of experience working with Elmhurst’s housing stock, and the pattern is consistent: the chimneys that surprise owners are the ones that looked fine from the firebox.
The Equipment Gap: What Professionals Bring
The second reason DIY cleaning stops short is equipment. A homeowner can buy a brush and rods for under $100. Replicating the rest of what a professional brings is a different question. Here’s the gap in practical terms:
- HEPA vacuum with a chimney-configured hose. A professional sweep uses a high-capacity HEPA vacuum connected to the firebox opening to create negative pressure in the flue. That’s what keeps soot and dust out of the living space during cleaning. A shop vac and a dust mask don’t do the same job, and the difference is visible afterward on every surface in the room.
- Borescope or inspection camera. This is the core of the diagnostic capability. A camera on a flexible rod lets the technician see the full flue length, photograph cracks, offsets, and joint erosion, and give the homeowner a report. There’s no practical homeowner equivalent – renting a borescope and running it up a dirty flue correctly takes experience.
- Proper rod length and flexibility. A flue can run 25 to 40 feet from firebox to cap, often with a bend. Homeowner brush kits often top out at shorter lengths or rigid rods that can’t negotiate an offset.
- Drop cloths and containment. Professional sweeps use heavy canvas and containment around the firebox and floor. The visible cleanliness of the room afterward is the reason this matters.
- Creosote treatment chemicals. For second- and third-degree creosote, a brush is the wrong tool. Professional sweeps use creosote conditioners and chemical treatments that soften the deposit before mechanical removal.
- Gas pressure gauge. For gas fireplaces, a technician checks gas pressure and the burner assembly, which a homeowner can’t safely assess.
The equipment gap isn’t about tools being expensive. It’s that the diagnostic capability – the camera, the containment, the knowledge of what a camera is supposed to show – is what turns a cleaning into an informed safety check. A homeowner can buy a brush for $45. Buying and correctly using the rest is neither practical nor cost-effective for a chimney you’ll address once a year.
When the inspection turns up damage, the repair work calls for materials made for the job. We work with DuraFlex liner systems for relining, HeatShield ceramic resurfacing for flue restoration, and Olympia Chimney and Copperfield components for cap and crown work. That’s the same professional-grade lineup certified chimney specialists rely on, and it’s part of what makes our chimney repair work hold up.
The One Scenario Where DIY Is Reasonable
We’d rather give you an honest boundary than a blanket “always hire a professional.” There is one situation where DIY chimney cleaning makes genuine sense: a gas-only fireplace with a stainless steel liner under 10 years old, used less than 20 times per year.
Here’s why each part of that qualification matters:
- Gas-only fireplace. Gas doesn’t produce creosote the way wood does. There’s no wood tar, no glazed creosote, and much less to remove. A gas fireplace with a properly vented flue rarely needs more than an annual check for debris, dust, and blockages.
- Stainless steel liner under 10 years old. A modern stainless liner is the flue. It’s engineered and installed as a continuous venting pathway, and unlike terra cotta, it doesn’t erode at the joints. If the liner is under 10 years old and properly installed, the risk of hidden failure is low.
- Used less than 20 times per year. Light use means less accumulated deposit and less opportunity for problems to develop.
Even in this scenario, DIY cleaning has limits. If the fireplace starts drafting oddly, if you smell gas, if you notice soot streaks around the burner, or if the fireplace has ever failed to light cleanly, stop and call a specialist. Those are diagnostic signals, not cleaning tasks. And in any wood-burning fireplace, regardless of liner age and use frequency, professional cleaning is the right call – a wood fire produces creosote, and creosote needs eyes on it.
If you’re in Elmhurst and you’re not sure which category your fireplace falls into, that’s not a decision to guess at. A single inspection tells you. Call (844) 871-3169 – the estimate is free.
How to Inspect Your Own Chimney Between Professional Visits
There’s real value in a homeowner checking the chimney between professional cleanings. The trick is staying within the safe inspection zone. Visual observation from the room, from the ground outside, and from the firebox with a flashlight is genuinely useful and doesn’t require specialized tools. What you don’t want to do is climb on the roof, disassemble parts, or reach into the flue above the damper.
Here’s a step-by-step routine that stays inside the safe zone:
- Look up from the firebox with a flashlight. Shine the light up past the damper. You’re looking for obvious cracks in the visible flue tile, heavy soot or crusting, or anything visibly blocking the flue. Do not put your hand or any tool up into the flue. And do not attempt to clean above the damper yourself in a masonry chimney – that’s a job for someone with the right tools and the training to recognize what they’re seeing.
- Open the damper and check its operation. A damper that sticks, doesn’t open fully, or doesn’t seal is worth noting. It’s a smaller issue than a cracked liner but often an easy fix.
- From the ground outside, look at the chimney top and cap. Binoculars work well. Check that the cap is intact, the screen is present and unclogged, and the crown (the sloped top of the chimney) shows no obvious cracking. Missing caps invite birds and squirrels; damaged crowns let water in. Both are easy to fix and expensive to ignore.
- Watch the fire while it’s burning. A fire that smokes into the room, drafts weakly, or shows a reversed draft on a cold start is a sign of a flue problem. That’s a diagnostic signal for a professional, not a cleaning project.
- Check carbon monoxide alarms. This isn’t chimney inspection exactly, but it’s part of safe fireplace use. Every home with a fireplace should have working CO alarms on every level. Test them during your seasonal routine.
- Note what you see and schedule the professional inspection. Write down anything that looks off. When the technician arrives, tell them what you observed and where. That context helps the inspection target the right places.
Staying in this zone gives you the information you need without putting you at risk. What you should not do is climb onto the roof, remove the cap, or work above the smoke chamber. Those are the tasks that make professional work worth it, and they’re the tasks most likely to end with a fall or a chimney problem made worse. A proactive visual check also tells you whether your chimney cap & crown is doing its job, which is a quieter determinant of long-term chimney health than most homeowners realize.
Creosote Degrees and Why They Matter
Creosote is the residue of wood combustion, and it forms in three distinct stages that call for different responses. The three degrees are the reason “cleaning” isn’t a single job – and the reason a brush alone can’t solve every creosote problem.
First-degree creosote
Soft, sooty, and flaky. It brushes off easily. This is the stage most homeowners can address themselves in a gas or lightly used wood fireplace. Annual cleaning handles it.
Second-degree creosote
Hard and crusty, sometimes papery. It bonds to the flue wall and doesn’t come off with a standard brush. Removing it requires targeted tools and sometimes creosote conditioners. This is the stage where DIY cleaning starts to fail: a homeowner brushes, sees no result, and assumes the flue is clean when it isn’t.
Third-degree creosote
Glazed and tar-like. It’s the most concentrated, most combustible form, and it’s the layer most associated with chimney fires. Getting rid of it means chemical treatment or, in severe cases, relining. A brush is useless here, and this is exactly the layer that can build invisibly in an undercleaned flue.
The practical implication is that a brush removes what’s easy and leaves the dangerous layer in place. Intermediate stages are where a trained technician makes a real difference, because the diagnosis isn’t obvious. That’s also why we include the camera inspection as part of standard service – it’s the only way to know which stage you’re dealing with and where.
A Step-by-Step Decision Framework
When you’re deciding between DIY and professional cleaning for your Elmhurst chimney, run through these questions in order. The framework is honest about when a homeowner can reasonably handle the job and when they shouldn’t try.
- Is the fireplace gas-only or wood-burning? Gas-only with a newer liner is the only real DIY candidate. Wood-burning is a professional call. If you burn wood and don’t have a professional inspection in the past year, that’s your starting point.
- Does the chimney have a stainless liner, and how old is it? Under 10 years and proper installation puts you in DIY-possible territory. Older, unknown, or terra cotta only means professional inspection.
- How often is the fireplace used? Under 20 uses per year keeps creosote accumulation light. More than that, or burning on a regular heating-season schedule, means more deposit and more reason for a professional look.
- Have you noticed any warning signs? Smoke in the room, a weak draft, an unusual smell, soot streaks, or a CO alarm event all override the DIY case. Stop and call a specialist.
- When was the last inspection? A camera inspection within the last year means you already know what’s in the flue. If it’s been longer, a professional inspection is the sensible starting point even if you plan to clean yourself afterward.
- Do you have the right equipment for safe cleaning? If the answer is “no HEPA vacuum, no containment, no way to see the flue,” then professional cleaning is the correct choice even if the fireplace qualifies for DIY. The cleanliness of your home afterward is a real part of the outcome.
Where most homeowners get stuck is at step two, because they don’t know what’s in their flue. A single inspection resolves it, and it’s why we lead with the walkthrough and the camera. Our Elmhurst Chimney Sweep team brings both, and the report is yours to keep. That’s the kind of information you need before making the decision either way.
Common Mistakes to Avoid
- Assuming a clean-looking flue is a safe flue. A flue looks clean from the firebox after a sweep even when cracks and joint erosion remain above the damper. The only way to know is a camera inspection, and the only way to trust the result is to see the photos yourself.
- Using the wrong brush for the flue material. A wire brush on a stainless liner or a soft liner can scratch and damage it. Match the brush to the material, or let a professional choose – a wrong brush does damage no cleaning undoes.
- Sweeping without any containment. Chimney soot contains fine particles that settle into furniture and fabric for weeks after cleaning. A shop vac and an open firebox don’t prevent it. HEPA vacuums and canvas containment exist because they’re necessary.
- Climbing the roof to check the cap without proper equipment. Falls from roofs are the most common serious chimney-related injury, and they happen to homeowners checking “just one thing.” Use binoculars from the ground and leave the roof to a professional.
- Burning unseasoned wood to “burn out” the creosote. It doesn’t work. Wet wood creates more creosote, not less. Seasoned firewood with low moisture content is the real preventive measure, and it’s cheaper than a relining job.
- Skipping the annual inspection because the chimney “seems fine.” The chimney that seems fine is exactly the one where problems hide. In Elmhurst’s pre-1970 homes, terra cotta liners can deteriorate for years without any visible sign from inside the firebox.
- Ignoring CO alarms because the fireplace was just cleaned. A clean flue doesn’t rule out carbon monoxide risk. It reduces fire risk. CO alarms are the backup safety system and should be tested regularly regardless of cleaning history.
See the difference
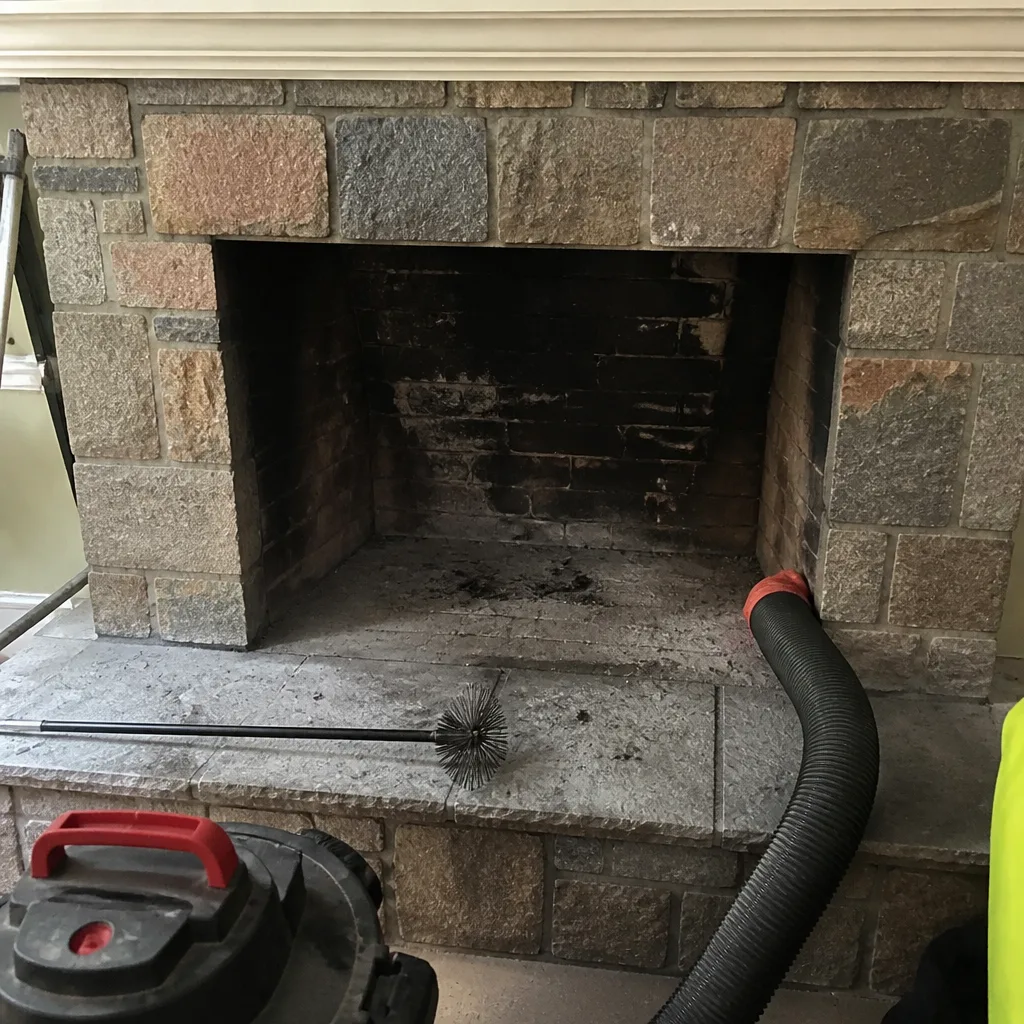 Before
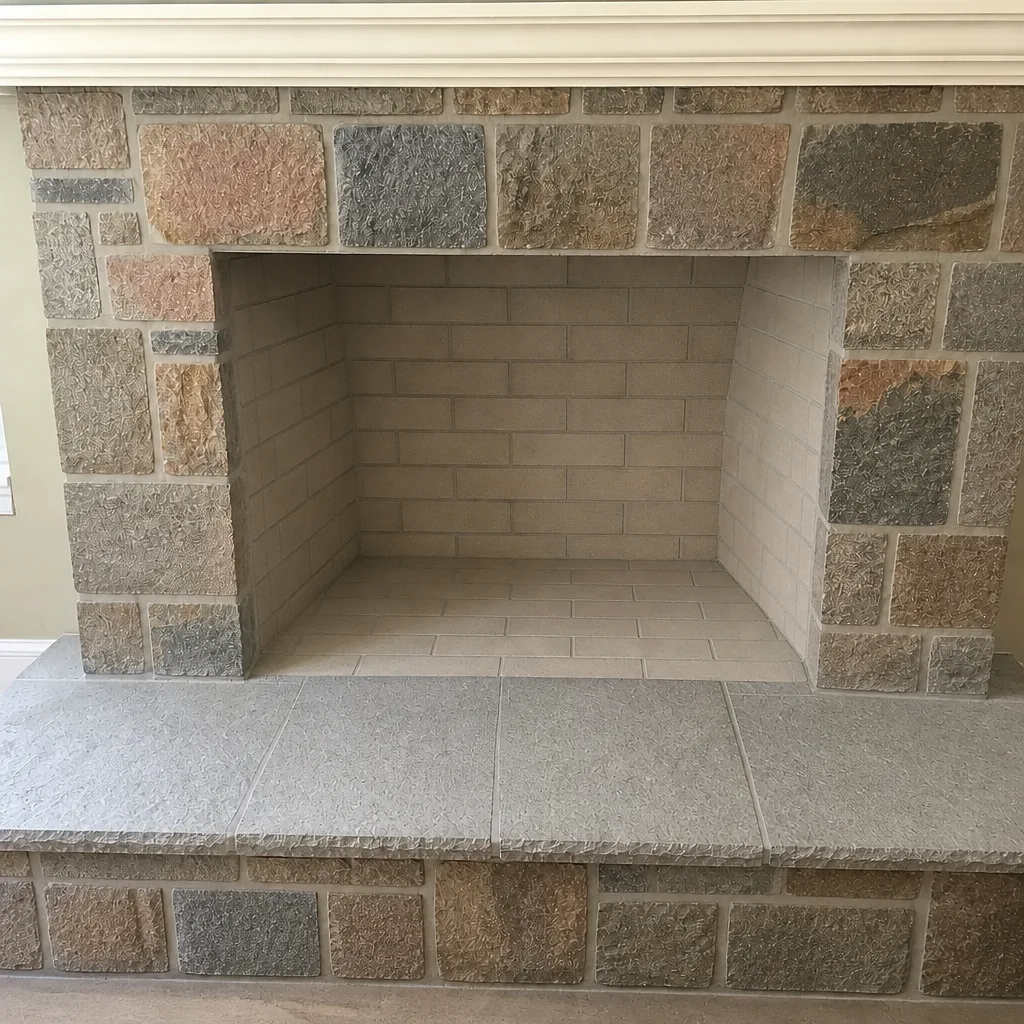 After
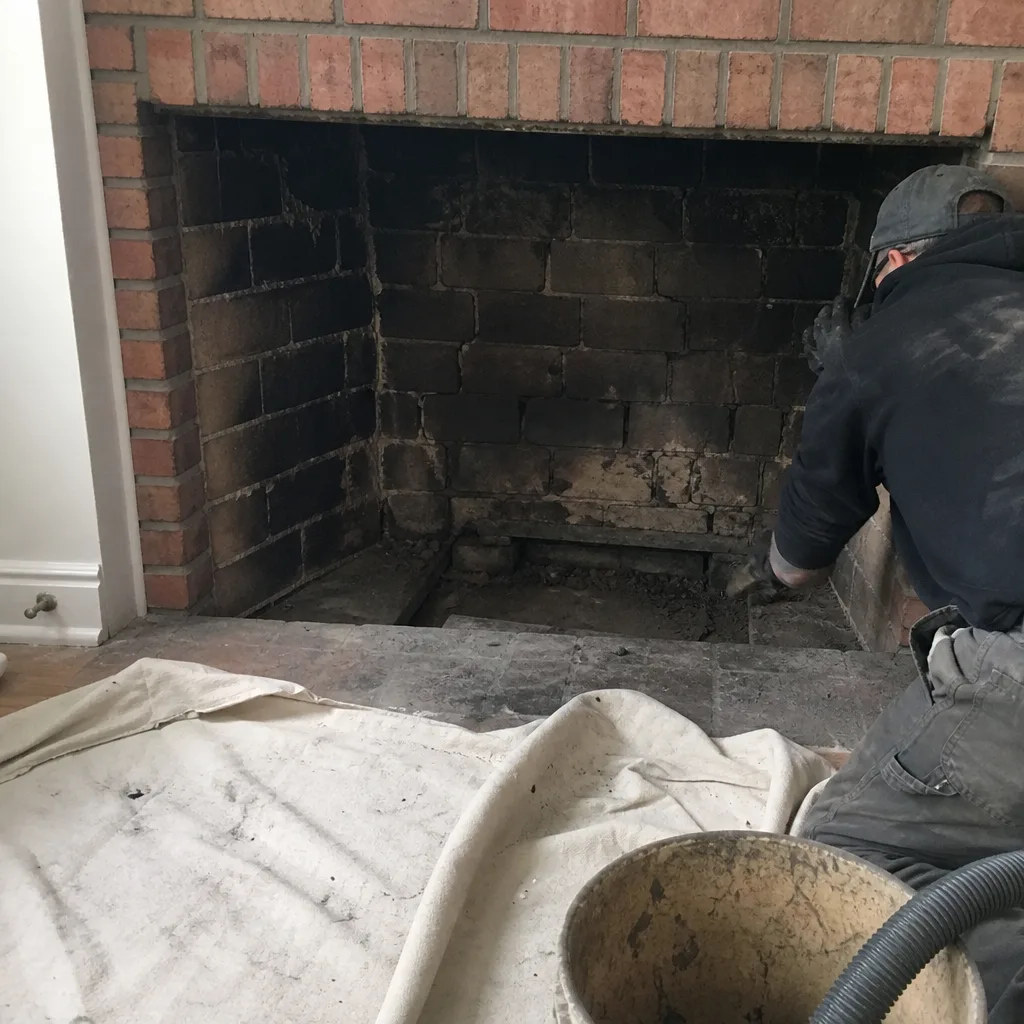 Before
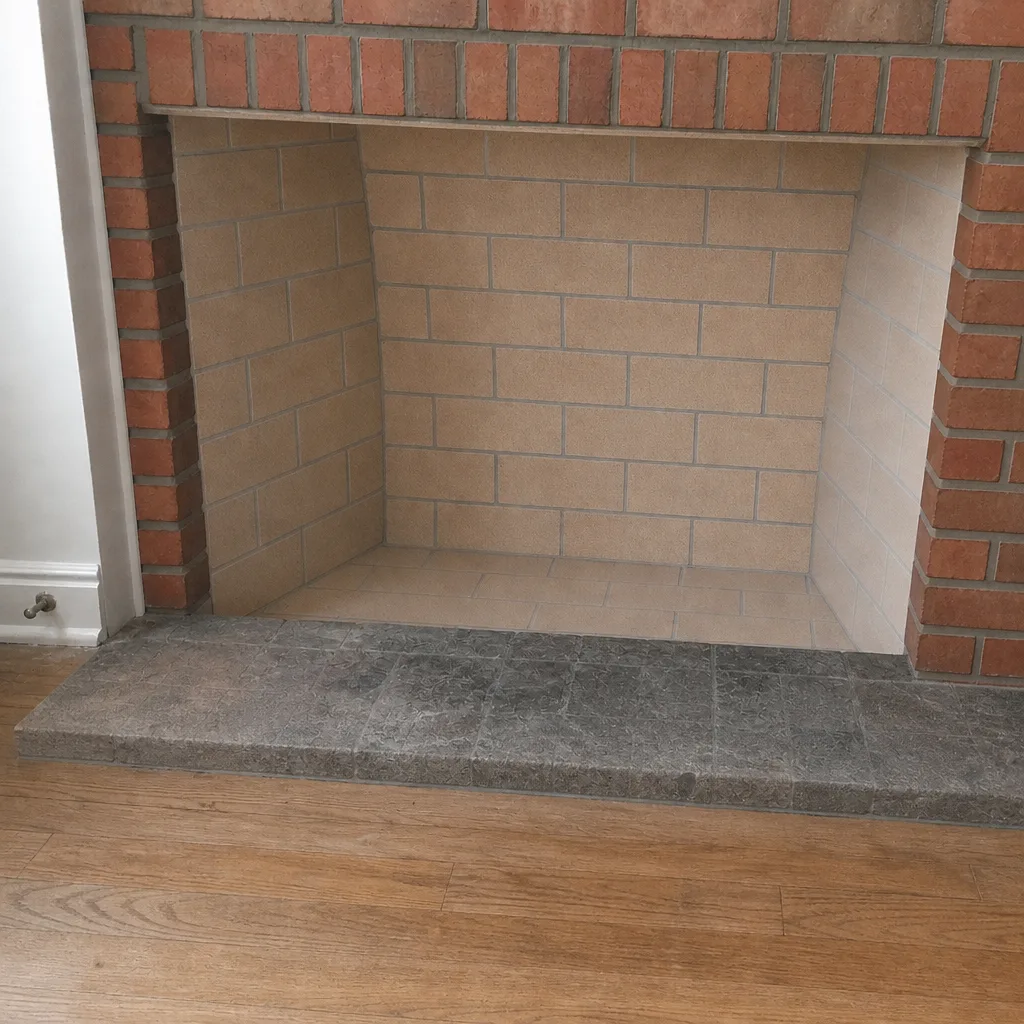 After
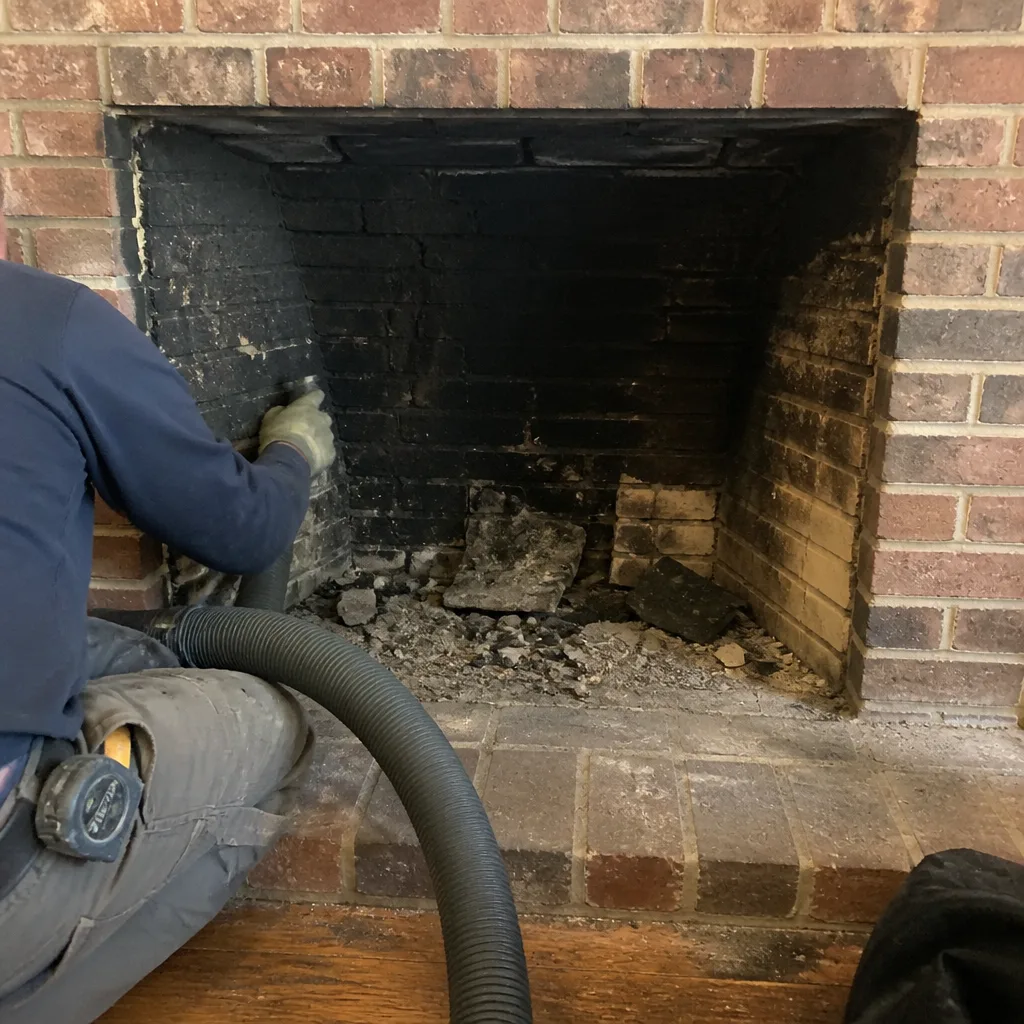 Before
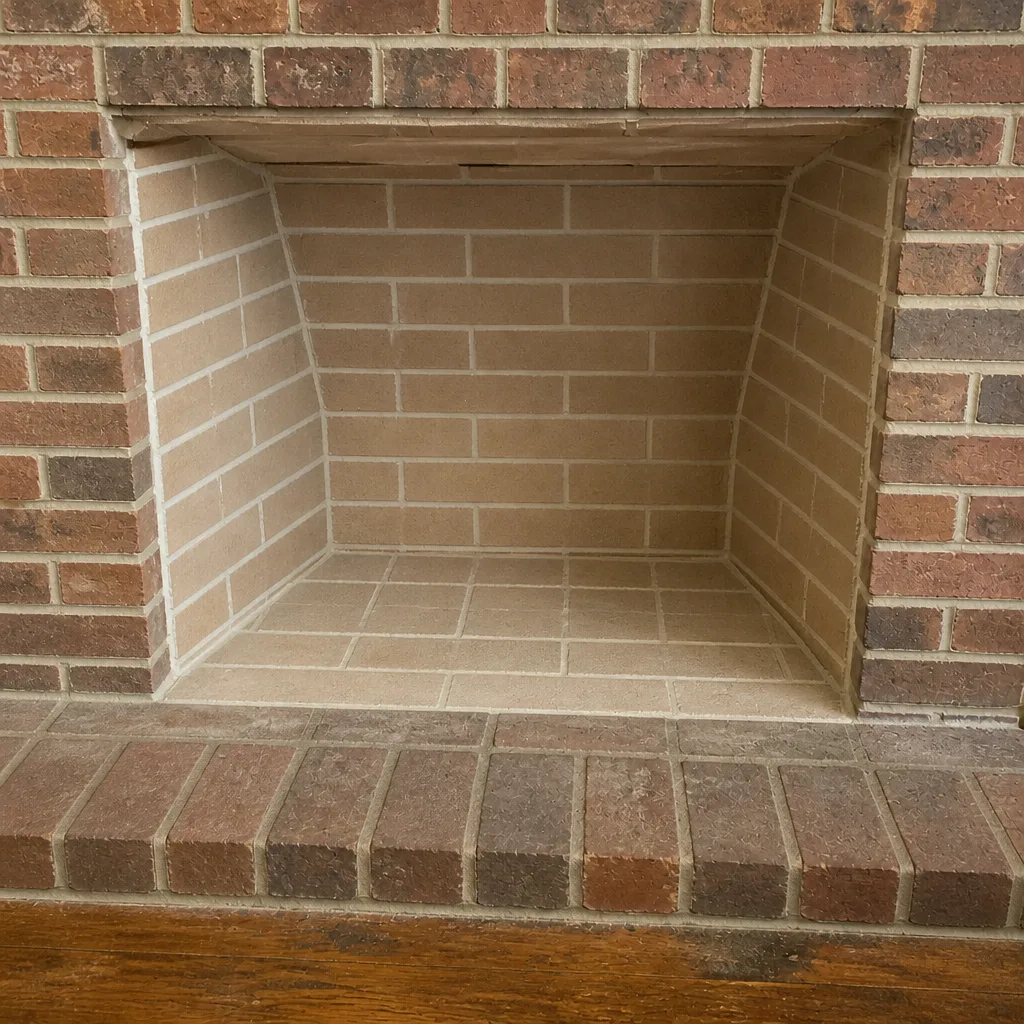 After
When to Call a Professional
Call a professional for any wood-burning fireplace that hasn’t been inspected in the past year. Call immediately if you notice smoke backing into the room, a persistent smoky odor when the fireplace isn’t in use, soot streaks on the wall or firebox face, a CO alarm that has gone off, or visible damage to the chimney cap or crown from the ground. Call before your first fire of the season if the chimney hasn’t been cleaned in over a year, or if you’ve moved into an Elmhurst home and don’t know the chimney’s history. Call if the flue has a terra cotta liner older than a few decades and you have no record of an inspection – those liners fail quietly, and an inspection is the only way to find out where yours stands.
Elmhurst Chimney Sweep offers free estimates in Elmhurst – call (844) 871-3169. We answer 24/7. Fast dispatch from 7am to 7pm, Sunday through Friday.
Frequently Asked Questions
It’s safe to brush light first-degree creosote from a flue that’s already been inspected and is in good condition, or from a gas fireplace with a newer stainless liner. It isn’t safe to clean a masonry chimney you haven’t inspected, to climb on the roof, or to try to remove glazed creosote yourself. Call (844) 871-3169 for an exact quote on a professional inspection – estimates are free.
You can usually see the liner from the firebox with a flashlight – terra cotta is clay-orange and jointed, stainless is gray metal. If you can’t tell, an inspection resolves it quickly. Our technicians have up to 9 years of experience identifying liner types and conditions, and the camera inspection shows you exactly what’s in your flue. A professional look is the fastest way to know, and the estimate is free.
A professional cleaning includes a camera inspection of the full flue, a photo report of what was found, HEPA-vacuum containment that keeps soot out of your living space, proper rod length and brush selection for your flue material, and a diagnosis of any creosote degree, crack, offset obstruction, or joint erosion. DIY cleaning with a brush kit removes only the first-degree layer the brush can reach. That difference is what you’re paying for.
Wood-burning chimneys should be inspected annually and cleaned when the inspection shows buildup – typically once a year for regular fireplace users. Gas fireplaces with newer liners can often go longer between cleanings. Elmhurst’s older housing stock tips the balance toward annual inspection, since terra cotta liners can deteriorate without visible signs. Call (844) 871-3169 to schedule – the estimate is free.
Yes. The most common self-inflicted damage comes from using a wire brush on a soft stainless liner, forcing a brush past an offset and cracking a flue tile, or dislodging a cap or crown while working from the roof. Renting the wrong equipment or working above your skill level can turn a simple cleaning into a repair job. A professional sweep uses brushes matched to your flue’s material for a reason.
Creosote accumulates in layers that get harder and more combustible the longer they sit. Skipped cleanings raise the risk of a chimney fire and can lead to glazed third-degree creosote that requires chemical treatment or relining rather than simple brushing. Carbon monoxide risk also rises when a flue is partially blocked. If it’s been more than a year, call (844) 871-3169 for an inspection – the estimate is free, and it tells you exactly what you’re dealing with.
The Bottom Line
DIY chimney cleaning isn’t reckless, but it’s narrow. It removes what a brush reaches and tells you nothing about what it can’t see. For a gas fireplace with a newer stainless liner and light use, that’s enough. For a wood-burning fireplace, or for any Elmhurst home with a terra cotta liner of unknown age and condition, professional cleaning is the right choice because the diagnostic half of the work – the camera, the photos, the trained eye on cracks and joint erosion and creosote degree – is where the real value lies. The safe move is to know what’s in your flue before deciding. From the crown down to the firebox, we cover the full system: inspection, cleaning, cap and crown work, repair, and fireplace service.
Call (844) 871-3169 for a free estimate. We answer 24/7. Fast dispatch from 7am to 7pm, Sunday through Friday.
Written by the team at Elmhurst Chimney Sweep.